Plugins
Plugins you can use without any custom coding on your own website. They will allow you to add more advanced e-commerce features. For instance, one simple plugin lets you start a full-fledged business.
Download the plugins
Magento
Magento plugins for the Checkout
Prestashop
Prestashop plugins.
WooCommerce
WooCommerce plugins.
Install WooCommerce
Installation
To install a Plugin:
- Go to Plugins.
- Click Add New.
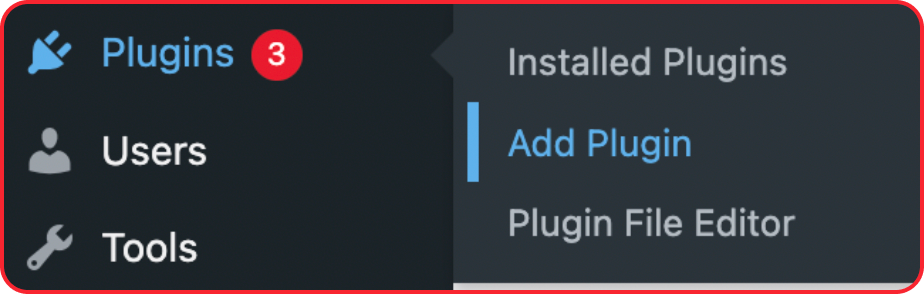
- Click Upload Plugin.
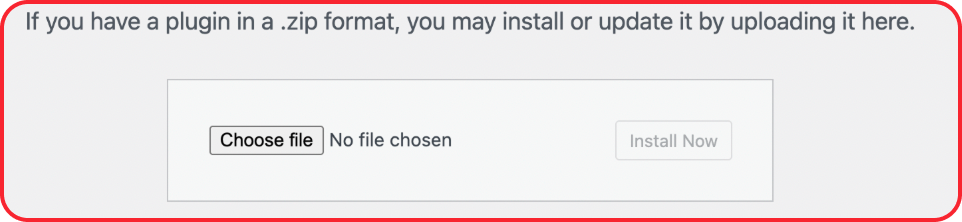
- Select the plugin file and click Install Now.
- Click 'Activate'.
WooCommerce configuration
To configure WooCommerce:
Open your session in WooCommerce
- Go to WooCommerce → Settings
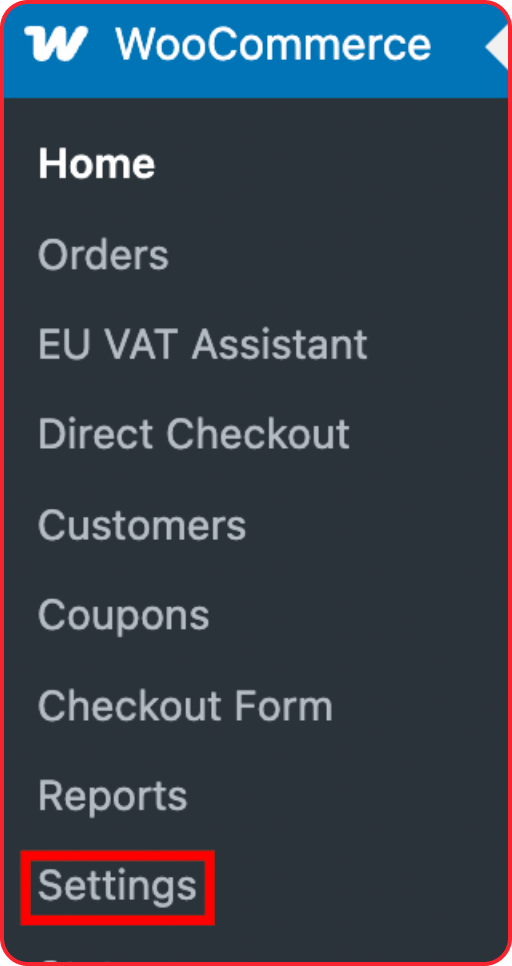
- Open the Payments tab
- Find WPG Commerce
- Click 'Manage'.
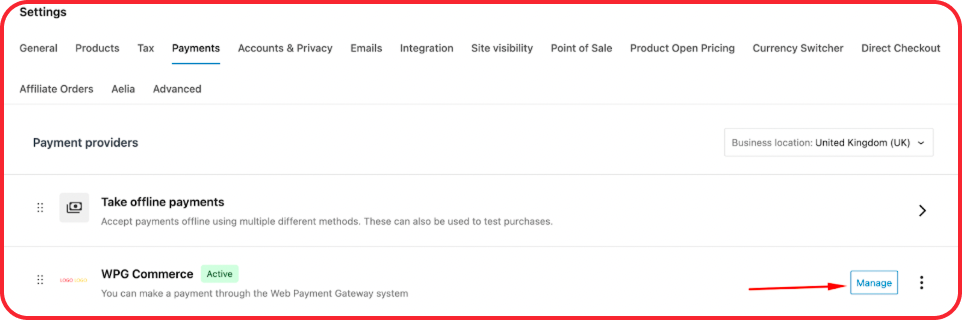
Start the configuration
Fill in the fields as described below:
- Enable WPG Commerce
Enable the payment method. If disabled, the method will not appear at checkout.

- Title
This is the name displayed to customers at checkout. Example: Credit Card / Secure Payment

- Checkout Host
Enter the payment gateway checkout URL.
Example: http://pay.your-domain.com
infoThis is your white-label checkout domain provided by your payment provider.
- Payment Method
Leave this field empty. Do NOT select:
- Card
- Google Pay
- PayPal
warningPayment methods are dynamically provided by the gateway. Selecting values here may override gateway configuration
- Merchant Key
Enter the Merchant (Test) Key provided by your payment provider.
- Merchant Password
Enter your Merchant Password. Used internally to generate a secure hash for payment requests.
- Callback URL
The Callback URL is generated automatically by the plugin.
Example: https://yourstore.com/?wc-api=wc_web_payment_gateway
Copy this URL and send it to your payment provider, or set it up in merchant settings if you have access:
Make sure to submit changes.
- VAT Calculation (optional)
Enable it if you want VAT to be calculated by the payment system. Behaviour:
- VAT is calculated based on the public payer IP
- WooCommerce tax settings may be overridden
- Possible double taxation if WooCommerce tax is also enabled
- Iframe Payment (optional)
Name or keyword of the browsing context where the customer should be returned according to the HTML specification. Possible values:
- _self
- _parent
- _top.
Find the result of applying the values in the HTML standard description (Browsing context names)
infoThe payment page is still hosted by the gateway Some payment providers may not support iframe 3DS may open outside the iframe
- Display Hook (for iframe only)
Defines where the iframe is displayed. Available options:
- woocommerce_thankyou
- woocommerce_order_details_after_customer_details
- Form ID (optional)
Used for custom payment page design:
- If an ID number is provided, a custom form (previously created by the payment provider – not in scope of this plugin) will be displayed.
- If empty, the default checkout page will be used
- Order Status
Select the status to be applied after successful payment. Options:
- Completed
- Processing
- Enable Debug
Enable logging for troubleshooting.
- Logo (optional)
Custom logo displayed for the payment method at checkout.
WooCommerce Payment Flow
- The customer places an order in WooCommerce.
- The customer is redirected (or shown an iframe) to the payment page.
- Payment is processed on the gateway side.
- Gateway sends a callback to WooCommerce.
- The plugin updates the order status automatically.
warningStatus updates are handled via callback only No manual status polling is used